DIY Fitness Motivation Fabric Drink Coasters
About a month ago the uber crafty and talented Dana Lardner — the CEO and Designer of Words to Sweat By, a company that offers fun and affordable motivational health and fitness accessories — showed us how to make our own motivational bracelets. And today she’s back with a tutorial on is how to make our very own fabric drink coasters that’ll motivate you to move your booty!
Just as people come in all different shapes and sizes, so does fitness motivation. And with daylight hours fading faster than you can say “pumpkin spice latte,” many people’s get up and go (to work out) has gotten up and left.
So why not create a little something to remind you to stay on track even when you’re sipping chai tea and munching on biscotti? You can make these health- and fitness-inspired drink coasters in four easy steps! Not only will they protect your tables, but they’ll also provide some extra fitness motivation throughout your day.
DIY Fitness Motivation Fabric Drink Coasters
Fabric Drink Coaster Supplies Are Simple!
1. Cotton fabric. To make four coasters and depending on the print, you’ll need about 1/4 yard of fabric. You can have a lot of fun with fruit and vegetable prints or activity-inspired prints like this marathon print, bicycle print or yoga print.
2.Iron-on vinyl. The Pellon Vinyl Fuse is available at many craft/fabric stores or online, and you’ll need 1/4 yard as well.
3. Mod Podge. Mod Podge is also available at a local craft store or online. You only need a very small amount for this project. After working with if you’ll find a variety of additional uses in no time.
4. Sponge brush. Any small paint brush will do, but I like to use a sponge brush because it makes it easy to apply the Mod Podge very evenly.
5. Cork coasters. A set of four cork coasters is available at many craft stores or online.
6. Scissors or rotary cutter. You need some sharp scissors or a rotary cutter to cut around the coaster to trim off the excess fabric.
Fabric Drink Coasters In 4 Easy Steps
 1. Iron on the vinyl to the cotton fabric.
Follow the manufacturer’s instructions to iron on the vinyl to your fabric.
Fortunately, after peeling off the backing, it’s not sticky to the touch when you’re working with it. So, you will be able to position it easily and then fuse it with the fabric.
The picture (right) shows what it looks like afterwards.
2. Apply thin coat of Mod Podge to coaster.
Take your sponge brush and gently dip it into the Mod Podge. You will want to make sure to cover the whole cork coaster and pay extra attention to the corners to ensure that you’ll have a tight finished edge. Let the glue dry for 20 to 30 seconds so that it’s tacky, not wet.

3. Place coaster on fabric. Take the cork coaster and place the tacky side face down on the wrong side (non-vinyl side) of the fabric. Place a book on top of it to apply constant pressure and let it sit for approximately 15 to 20 minutes.
4. Cut out coasters. Using scissors or a rotary cutter, cut tightly around the edges of the coaster to trim away the excess fabric and complete the coaster.

5. Sip some tea, save the table. After cutting out the coasters, they are immediately ready for use. So, pour a mug of your favorite coffee or tea and enjoy!
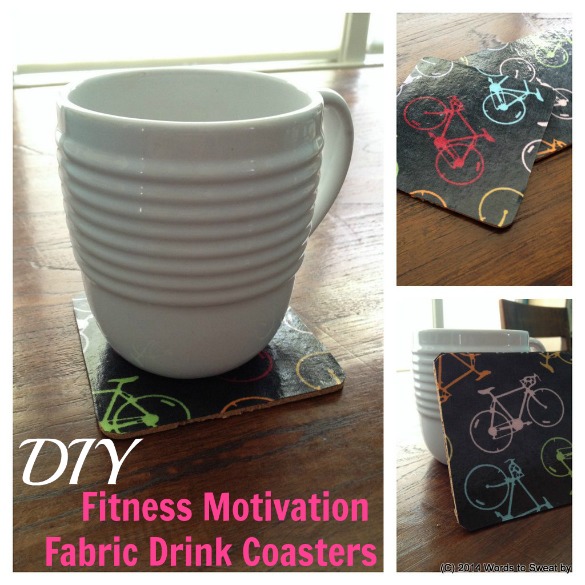 Now whenever you use your DIY drink coasters you get a visual reminder of your favorite kind of exercise, which, you know, totally makes you want to get out there and do it! What fabric will you put on your DIY drink coasters? And talk about a great gift idea … ! —Dana
Comments
Love this idea and pinned it!
Comments are closed.