TRX Workouts: How to Use It for Yoga
Yoga is a funny beast.
Some poses are so welcoming to beginners — Child’s Pose! Warrior I! — while others … well, it takes a little more practice and a whole lot of confidence before you’re ready to attempt them in a class setting. (I’m looking at you, Half Moon Pose.)
It’s really nice to be able to work on some of these poses in a way that allow you to build up, which is why I’m a huge advocate of having yoga blocks and straps available any time I’m practicing. But sometimes — especially when it comes to some of the more challenging balance poses and inversions — a block and a strap just won’t cut it.
And that’s where it is incredibly handy to have a TRX suspension trainer available. It can make some of those tricky yoga poses a little easier to do, especially if you know the right steps to take!
Happily, our friends at TRX are all over that! They have some really fantastic videos with TRX workouts starring Shauna Harrison (yoga instructor, Under Armour athlete and all-around awesome chick) to guide you, step-by-step, through several different poses. You can find them all here, and we’re sharing her pictures and cuing instructions below!
Click through for the video!
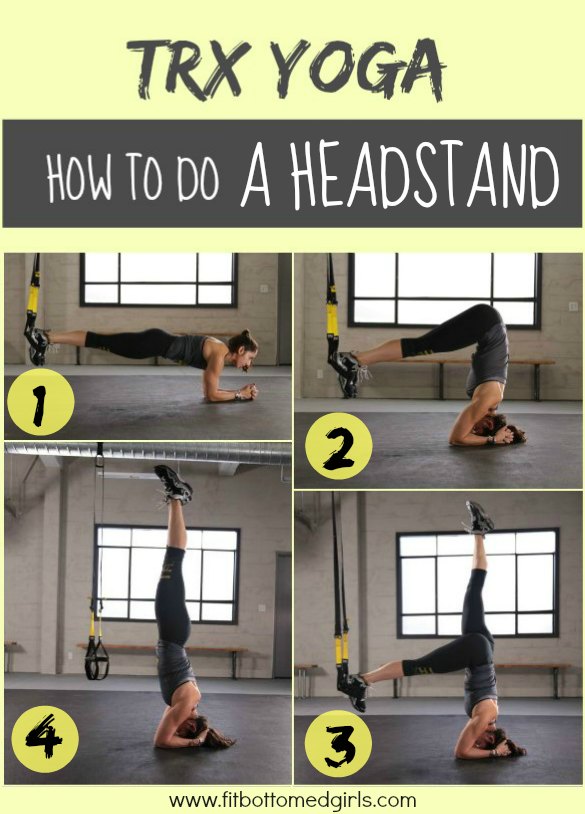
Headstand
Progression One: This is a TRX Plank on your forearms with your fingers interlocked. Your focus for this progression should be establishing your base through your arms and shoulders and engaging your core for a rock-solid plank.
Progression Two: With your feet in the foot cradles and your arms in that strong foundation position, pike your hips up directly over your shoulders and let the top of your head rest on the ground.
Progression Three: This is similar to progression two, but now only place one foot in the foot cradles and reach your other foot up over your hips. Make sure you do this with both legs.
Click through for video!
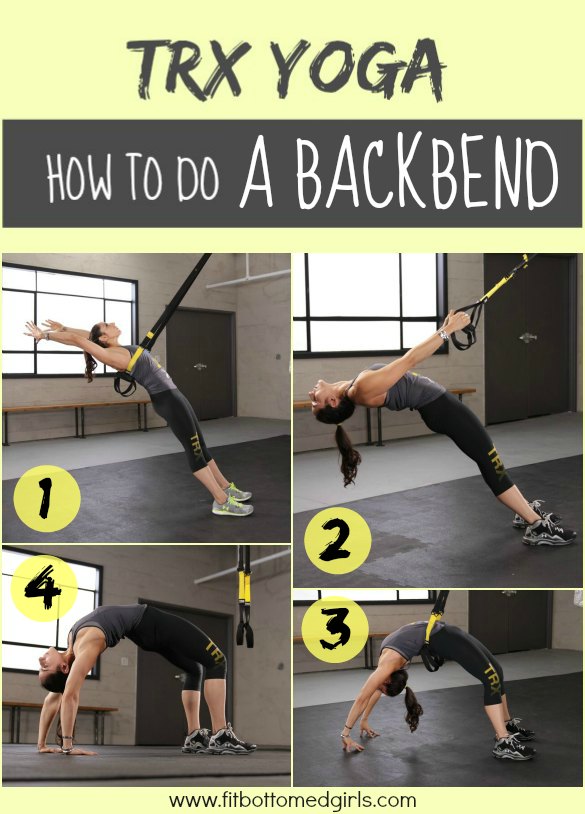
Backbend
Progression One: Building off of an idea borrowed from aerial yoga, this movement opens your hips, back and chest by unloading your body weight into the straps. First, fully extend the Suspension Trainer in single-handle mode. Put your upper body through the straps so that the interlocking handles are resting just below your shoulder blades. Ground your feet, extend your arms and lean back.
Progression Two: This progression allows you to get comfortable with your head below your heart in a backbend position. Stand facing the Suspension Trainer with the handles in both hands. Ground your feet like you did in progression one and push your hips forward to lean your head back.
Progression Three: Set up exactly like you did for progression one, but this time stand a little closer to the anchor point. Gradually reach back and step forward until you are performing a backbend, letting the straps act like a hand to support your middle back.
Click through for video
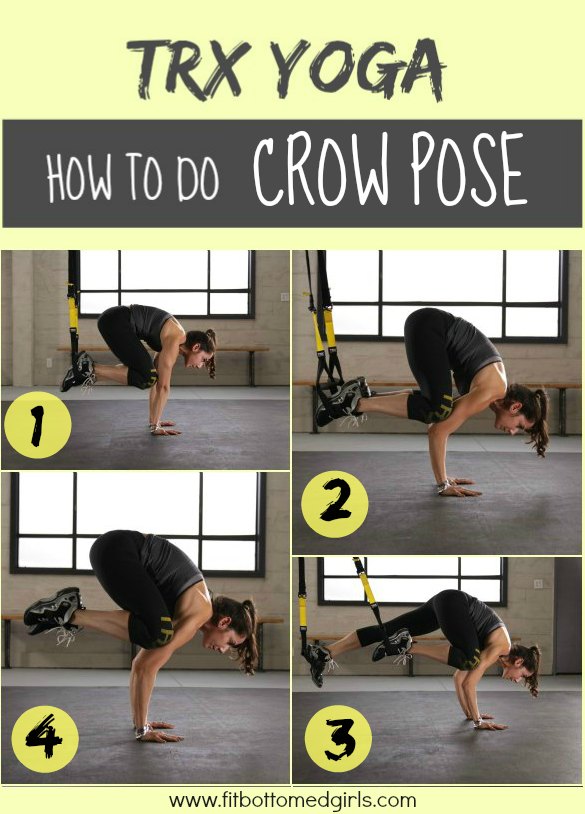
Crow
Progression One: This progression is basically Crow with your feet in the TRX foot cradles, directly under the anchorpoint. Use this modification to get into Crow correctly and safely, so you can develop your strength and balance.
Progression Two: With your feet still in the foot cradles, walk your hands away from the Suspension Trainer and practice drawing your knees to your triceps. This is an excellent way to work on using your core to control your balance.
Progression Three: With your feet still in the foot cradles, walk your hands away from the Suspension Trainer. Practice drawing your knees to your triceps one at a time, then pushing them back in a slow and controlled motion.

Click through for video!
Warrior III
Progression One: Warrior Three requires that you fold forward, hinging at the hips, and extend your arms out in front of you. This TRX Hinge will help you develop an understanding of the hip hinge while improving your hamstring flexibility. Stand facing the Suspension Trainer with your feet slightly wider than your shoulders. Drive your hands into the foot cradles and fold forward by pushing your hips back. Maintain pressure on the straps as you return to the top.
Progression Two: This is similar to progression one, only this time you are on one leg. Focus on keeping your hips square and your feet pointed forward. Don’t worry so much about getting parallel to the floor, think more about keeping your torso and elevated leg in a straight line.
Progression Three: When you’re ready, extend your arms out in front of you into full Warrior Three. Press your hands down into the straps for a greater stretch and to help you balance.
Which of these are you itching to try first? I think this will be a huge help for me with crow — I can get into the pose, but I always have trouble holding it. —Kristen