Sharing the Shame of My Own Epic Food Fail
One of the biggest laughs I had in the month of December was looking through this list of epic food fails. The stained glass cookies! The weeping rubber ducky cupcakes! By the end of the list, I was the one weeping with laughter.
And before you jump down my throat and tell me how awful I am for laughing at these poor wanna-be bakers’ misfortunes, let me set you straight. I’m pretty sure I’m laughing with them, largely, because … well, I am one of them.
Sadly (or maybe not so sadly), my disastrous foray into the realm of cake pop-making remained undocumented (aside from a single tweet that simply said, “F*%# cake pops.”), but that was not to be the case for my fancy lemon basil cake.
You see, I’d popped into Trader Joe’s and been enchanted by the sample of what appeared to be a simple cake with a stunningly delightful flavor. I quickly purchased not only the cake mix and lemon curd they’d used for the samples, but also a basil plant. Because why buy some fresh basil when you can grow it, right?
I hurried home with my precious purchases, my mind positively brimming with big dreams of how great a success this was going to be at my party that night. I’d even thought of a really pretty pan I had at home to bake it in for maximum Pinterest-iness. Sure, I’m more a cook than a baker — cooking is like writing, where you can have a general idea of where you need to end up and tweak it along the way, whereas baking is like straight-up math with all kinds of exactness and stuff. I was an English major for a reason, guys.

Can you just picture how gorgeous this cake is going to be?
Anyway, allow me to share with you the process by which I came to create something a little different than anticipated: My Lemon Basil Cake Bites.

Step 1: Follow the instructions on the box. Follow the directions perfectly. Do not mess around here — add exactly the amount of milk and eggs required, and mix for the specified amount of time. Do not screw it up. Before you pour your batter into your fancy-schmancy pan, grease the heck out of that thing. Don’t hold back with the Pam.
Step 2: Bake it up. You’ve followed the directions without a single mistake, so just pour it in the (well-greased) pan and set it to bake for the minimum amount of time — 40 minutes, I think. Take a shower, do some yoga, whatever, but make sure to congratulate yourself on doing a great job on the mixing part. You might even start thinking now about how you’re going to present the cake so you can take really great pictures of it and share that shit on Pinterest. I mean, your guests (because, obviously, if you’re making this, you’re having people over, right?) are going to be FLOORED at how great this is.
Oh, also? Make sure to start this just an hour or two before your guests arrive. You know, for maximum freshness and stuff.
Step 3: Check it, rack it. If your experience is like mine, you’ll take it out at 40 minutes, stick a toothpick in, and find that it’s perfectly done. It’s a beautiful golden brown on top, and the toothpick comes out clean. Try not to hurt your shoulder patting yourself on the back at this point, but, you know, go ahead and give yourself a little pat. You’ve nailed it, right? Now all you have to do is wait for it to cool.
Step 4: Choose the perfect place to display it. Use the prettiest thing you’ve got. I pulled out a gorgeous bamboo cutting board that was the ideal size — just a little bigger than the cake, and a great complement to the natural flower design on the cake. God, Pinterest is going to go CRAZY over this cake, I thought to myself.
Step 5: Dump it onto the platter. Now is the moment of truth. Make sure to gently loosen it all around the edges, line it up with your chosen platter, and then turn the pan upside down and dump the cake out.
Step 6: #&*#&@(!@ I AM NEVER BAKING AGAIN. Once half of it comes out in a plop and the rest sticks to the bottom of the effing pan, the fun really begins. For starters, you’re gonna want to find another way to display it, because, as is? It looks TERRIBLE.
Step 7: Have a drink. Once you’ve stopped screaming obscenities at the oven, pour yourself a drink. Maybe an extra one, too, depending on how high your sights were set on this being a fabulous dessert. (I did not stop at one, rest assured.)
Step 8: Invent cake bites! Cut up the parts of the cake that are reasonably salvageable into small squares. You know, the parts that at least mostly have a top and bottom that will sort of stick together. Arrange them on a plate, cover each with a dollop of lemon curd and a few snips of fresh basil.
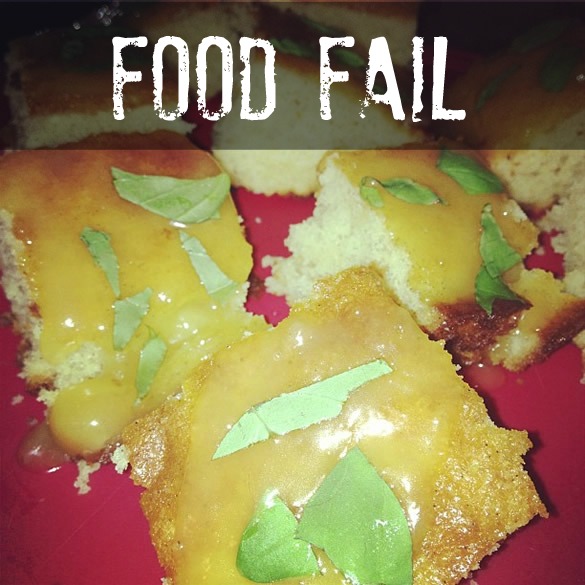
That is … not how I imagined this baking venture turning out.
Step 9: Tell everyone who saw it go down to tell your guests that this was the plan all along. No need to admit failure now. Lie, lie and deny, baby.
Step 10: Get drunk and tell everyone about how you failed at baking a cake and so, CAKE BITES. Please. It’s not like you’re going to keep that story to yourself.
Have you ever had a food fail so epic you couldn’t keep it to yourself? —Kristen
(A version of this post was originally published on my personal blog, Jeez-o-petes.)
Comments
Kristen,
Your gorgeous pan with all those little nooks and crannies had a lot to do with it, but the death blow was the Pam! It’s great most of the time but nothing beats butter and flour for a tricky pan like your! And no oil and flour don’t work either. I recently oiled a bread loaf pan instead of using butter cause hey it was sitting right there on the counter and ended up chiseling my beautiful loaf out of the pan – it happens to the best of us.
Well, THAT is good to know! I might have to actually try it again instead of my original plan of setting the pan on fire on the next chilly evening …
Comments are closed.